Computer related information
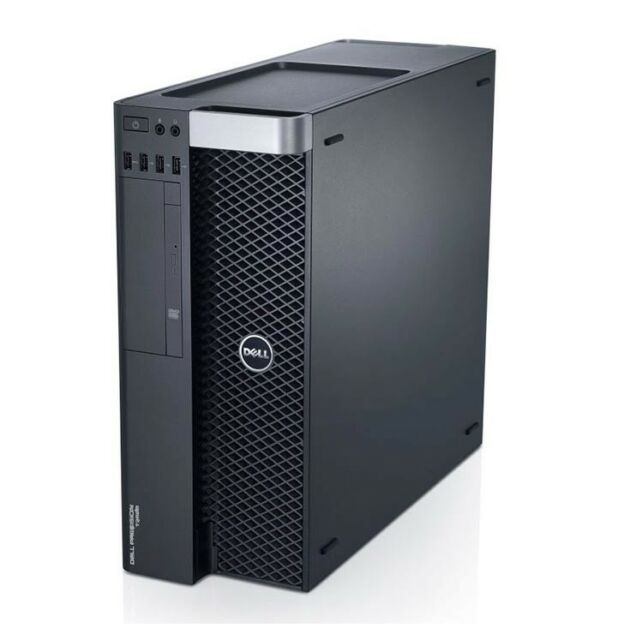
Your workstation is a state-of-the-art, powerful, server-grade computer, with two processors, 16 to 24 cores, 64GB of RAM, and a professional graphics card for accelerating 3D computations. It will come with some software pre-installed (e.g. MS Office). However, based on your project, you may request additional software to be installed..

Figure 4: What your workstation will look like. Credit: Dell
Software
UBC has license for the following software packages:
ArcMap, ArcGIS Pro
Envi+IDL
eCognition
Adobe suite, including Illustrator, Photoshop, InDesign etc.
You can also install some software packages yourself, as long as they are free or the license is available. Some of the most useful software packages we use in the lab currently include:
CloudCompare (for basic processing/viewing ALS/DAP point clouds)
Microsoft PowerToys is a set of utilities (developed by Microsoft) designed to improve the user experience on Windows 10. It has a few key functions that are incredibly useful in the lab, namely Fancy Zones and Color Picker.
The Fancy Zones plugin allows you to set zones on your screen outside of the standard two that Windows provides. The large screens in the lab make this a very useful function, as you can easily snap multiple windows to portions of your screen. To do this drag a window while holding Shift.
The Color Picker allows you to effectively use the dropper from image editing programs anywhere on your computer by pressing Win + Shift + C.

Figure 5: The lab and its many work stations.
IT questions or contact needs
If you have some questions about your computer reach out to Nicholas first. The IRSS has a dedicated departmental IT person named Felix Choi. If you need things installed or have hardware questions email him at felix.choi@ubc.ca.
Your laptop
You will receive a laptop that is for your personal use throughout the length of your graduate studies. Please remember that similar to workstations, laptops are also tracked by UBC. If you are unsure about installing a program, please make sure to ask Nicholas before installation. The same responsibilities apply to use of your laptop as the workstation.

Figure 6: Your laptop. Credit: Dell
If you are a TA and using the laptop for grading or have any TA material on there, it MUST be encrypted, which is performed by your IT contact. If your laptop was set up by UBC IT, it is automatically encrypted.
Backing up your data
Everyone should actively be backing up their data. People have worked hard on projects and lost everything due to hard drive failure. Don’t think it won’t happen to you - backup your data routinely.
There are 3 options for data backup:
Ask Nicholas for an external hard drive (HDD) to save data on.
Nicholas will pay for SYNC (4TB) - Ask him about it.
Automate backups using SYNC or other software like Cobian Backup. In the case of Cobian, schedule your backups to be incremental and run them daily.
- Once you have completed projects (or are done your time at the IRSS), you must backup your data on the data backup server
\\FRST-IRSStor\Root\IRSSbackup. See the next section for details on how to this needs to be done.
When you complete a project, compress your folders (always a good practice), create copies, and get them on the server. This will allow you to free up space on your own internal HDD’s and have the peace of mind that your data is secure.
Backing up on the server
Prior to dumping data onto the server please read the following steps and adhere to them to avoid loss and limit storage use.
- Compress your data - Compress individual folders within your directories. Do not make a single, massive, compressed folder! It will likely lead to corruptions in your data, and you will lose it all. Instead, compress data into smaller chunks, e.g. divide the data into projects or sub directories.
Downloading tools like 7zip makes compressing many folders at once easy. If you have many sub directories you need to compress and do not want to compress them individually make a .bat file with the script below, save it in the folder with your directories, and run it.
:: compress all directories and name them the same
for /d %%X in (*) do "c:\Program Files\7-Zip\7z.exe" a "%%X.zip" "%%X\"
There is a document with more details about using 7-zip in the orientation folder: \\FRST-IRSStor\Root\ByProject\Orientation.
- Copying your data to the backup server - Download TeraCopy and use it to transfer the data to the server. Errors often occur when large amounts of data are transferred over the network. TeraCopy allows you to
validatethe data transfer after the copying is done.
It is important to check the validate option! Validation can take a long time (about the same as the transfer) but gives you piece of mind that everything is ok. Errors will show up and you can then copy those files again.
- Naming Convention - Please use the naming convention:
LastnameFirstname. My name is Tristan Goodbody so my directory within the backup is calledGoodbodyTristan.
Connecting from home

Figure 7: Remote desktop prompt window.
In the lab, we can use the Windows Remote Desktop Connection tool to connect to our machines when we are away from the lab. There are a few steps to follow in order to connect to your lab machine:
To connect from home, sign-up for an Enhanced CWL that uses multi-factor authentication. Typically, this involves authentication using the Duo app on your smartphone: https://it.ubc.ca/services/accounts-passwords/multi-factor-authentication-mfa
Connect to a VPN. You should have Cisco AnyConnect installed on your work laptop, but it can also be downloaded from https://it.ubc.ca/services/email-voice-internet/myvpn/setup-documents. When logging into the VPN, ensure that you are using
myvpn.ubc.ca. Your CWL must be expressed asYourCWL.frsc@app. If your Enhanced CWL and VPN are setup correctly, you should receive a Duo login request on your smartphone. Approve this login request to complete the VPN connection. Additional information about logging in using an Enhanced CWL be found here: https://ubc.service-now.com/kb_view.do?sysparm_article=KB0018724&ga=Open Remote Desktop Connection and enter your computer’s name as follows:
frst-frm-22XYZ.ead.ubc.ca, whereXYZare the digits/letter unique to your desktop (there will be a sticker on the top of your computer tower with these details). Enter your Remote Desktop Connection username asEAD\YourCWL.Click
connect. You will be prompted to enter your password.
You have now successfully remoted in!
Note: it is possible edit the display settings to stretch over 2 screens if you wish. You can also use the minimize button if you are also working on your laptop at the same time without ending your remote session.
Connecting to printers
The IRSS has both a black and white and colour printer available for use, located in the western lab room (Room 2231). In order to gain access to them, follow these steps:
Install the HP Driver. When the option appears, select
Connect later.Download and extract the Xerox Driver. Choose either the PostScript or PCL driver. Note the directory where the Xerox driver is located (e.g.
C:\Users\YourCWL\Downloads\ExtractedXeroxDriver)Open
Control Panelthen go underDevices and Printersand clickAdd a printer.Click
The printer that I want isn't listed.Select
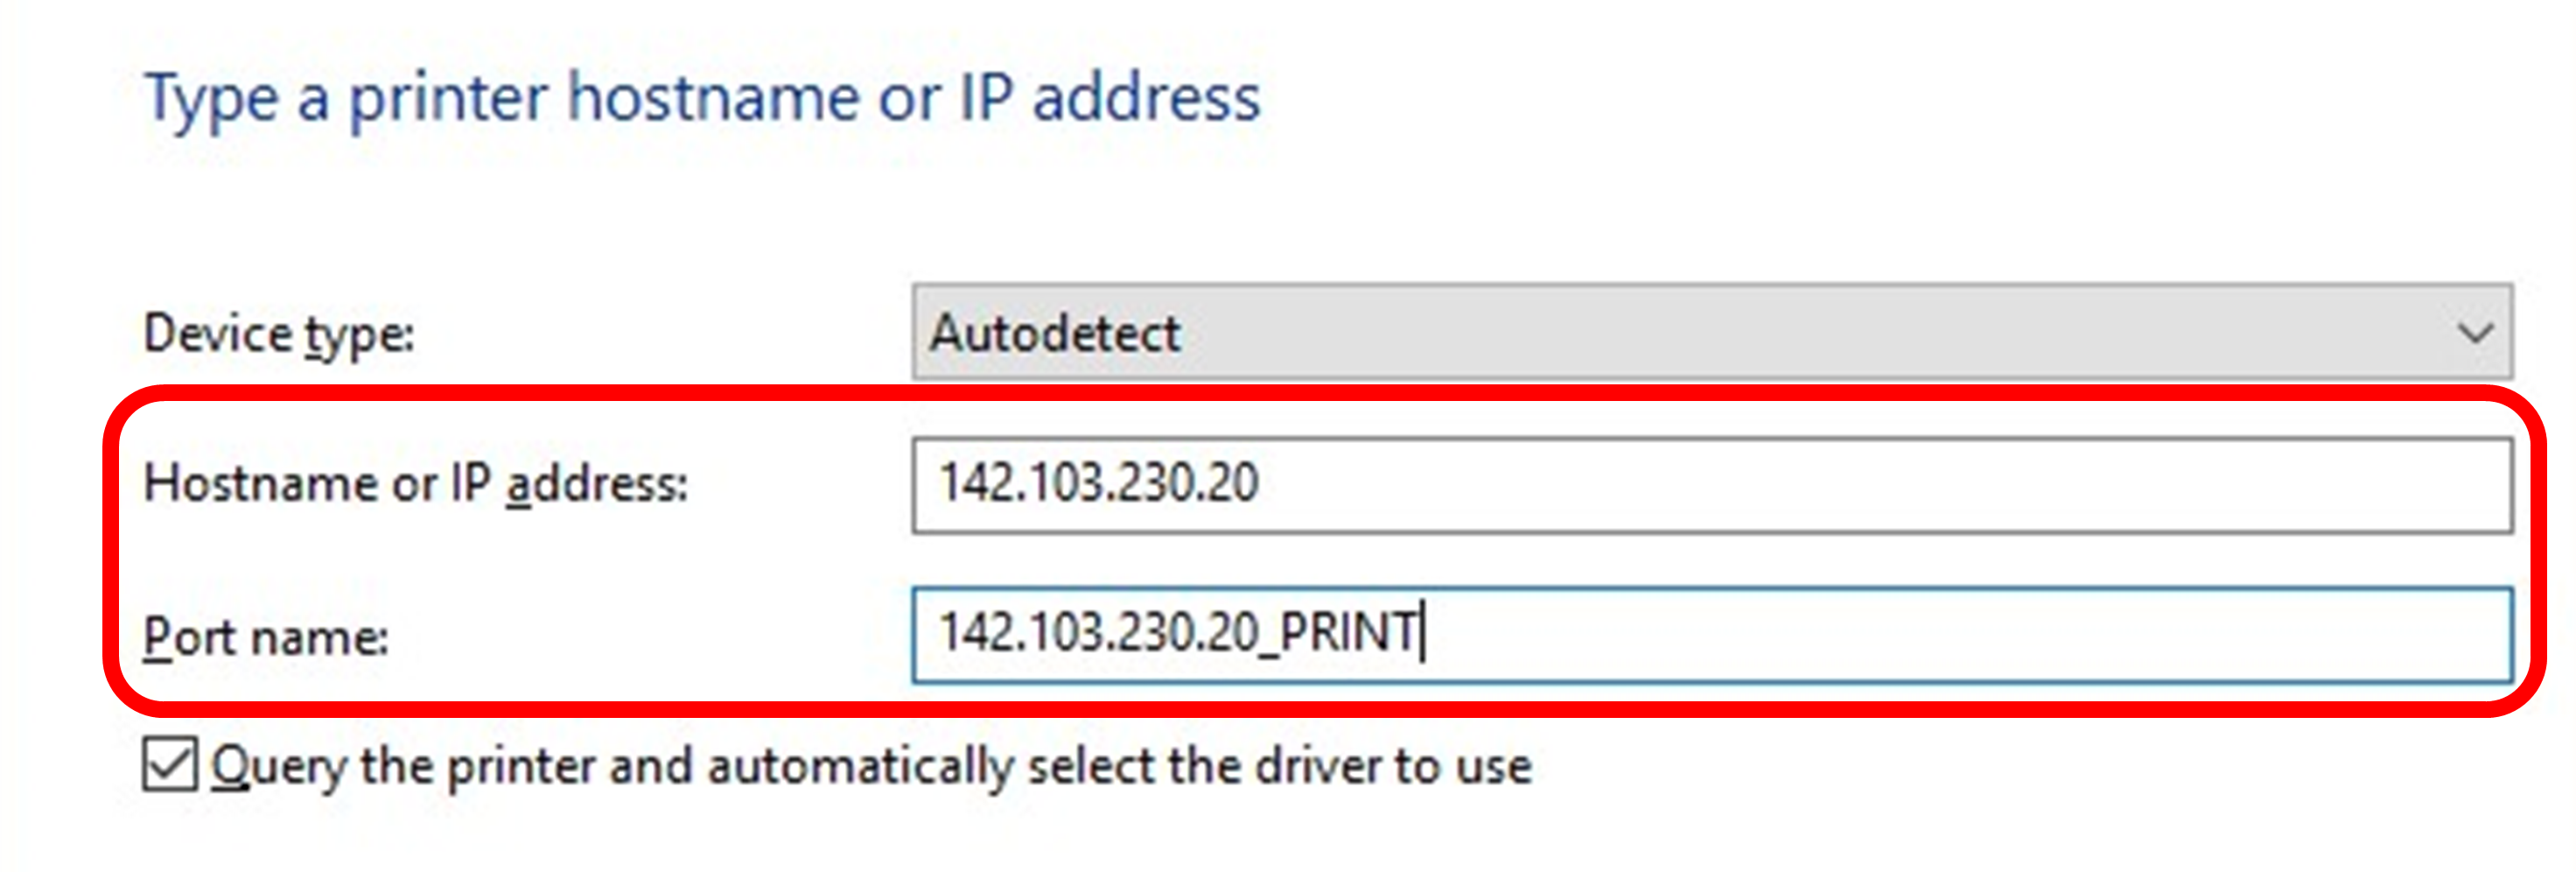
Add a printer using TCP/IP address of hostnamethen clickNext.Insert IP address of the printer (see IPs below). Append the
Port nameas shown then clickNext.
HP Color LaserJet E75245
IP: 142.103.230.21

Xerox Phaser 4510 Series Class Driver
IP: 142.103.230.20
Figure 8: IP address and Port name for step 5.
If a window appears that asks about driver version, select
Use the driver that is currently installedfor the HP colour printer. Manually select the Xerox driver that you extracted earlier (e.g.C:\Users\YourCWL\Downloads\ExtractedXeroxDriver).Keep the default printer name then click
Next.Make sure
Do not share this printeris selected then clickNext.
You should now be connected!
You can also look at \\FRST-IRSStor\Root\ByProject\__LABFORMS\IRSS Printers.docx for instructions with screenshots.
Connect to the lab’s network drives and printers from a non-lab computer
You need to be connected to either (a) the university’s VPN service (b) or to the ubcprivate WiFi network. To log into ubcprivate, use the username “{your CWL id}.frsc” and your CWL password.
After that, you can connect to the printers like outlined above (?). To connect to the network drives, use the following addresses:
\\frst-irsstor.ead.ubc.ca\Root\ByProject
\\frst-irsstor.ead.ubc.ca\Root\ByUser
Make sure you tick connect using different credentials when mapping the drive. Then use ead\<your_CWL_id> and the CWL password for authentication.
Contact Felix Choi (felix.choi@ubc.ca) in case of any issues.